Jessica of Emilia’s Luxe Linens was convinced that she was terrible with a camera. She felt stuck, thinking she’d need to hire a photographer to get dazzling product shots like other Etsy shops. Desperate for help, she signed up for a shop critique.
 Practically overnight, Jessica’s photos went from dark, blurry and unflattering to WOW. The before and after shots below will have you convinced she hired a photographer. She must have at least bought an expensive new camera, right?
Wrong. Jessica’s shop critique revealed 4 simple tips that sent her product photography quality skyrocketing. Jessica is still using her husband’s middle of the road Nikon camera, but now she takes stunning photos that tempt buyers into her shop and land her on Etsy’s front page.
The transformation was so unbelievable that I had to share it.
While I knew my photos were not good, it was still difficult to hear how really bad they were.
It turns out Jessica isn’t terrible with a camera, she’s actually really good. She just needed a push in the right direction. Encouraged by the thought that her shop could look like the professional shops she’d seen on Etsy, Jessica put the photography tips to work right away.
Photos at the right time of day
 Jessica was taking many of her photos in the evening, since it was hard to find time during the day. The lack of natural light meant using her camera flash, which caused bright spots in her photos.
Ditching the flash and using natural light for her photos put the focus on her product, not the unusual lighting. Jessica went to each room in her house during bright parts of the day and scouted for the best conditions. She learned from the critique to find a room not only with plenty of light, but one with light coming in from more sides as well.
She now makes sure to set aside plenty of time to take photos when the lighting is at its best.
Simple product staging tricks
Shockingly, the blurring effect was intentional! I thought it looked “professional”.
Most of Jessica’s shots were taken top-down, with her linens laying flat on a dark table. The products looked a bit lifeless, not to mention blurry from overusing the macro setting on her camera designed for close-up shots.
Jessica bought some white poster board to use as a neutral backdrop, rather than a fabric; the extra sheen from the poster board gives the photos an added pop of light.
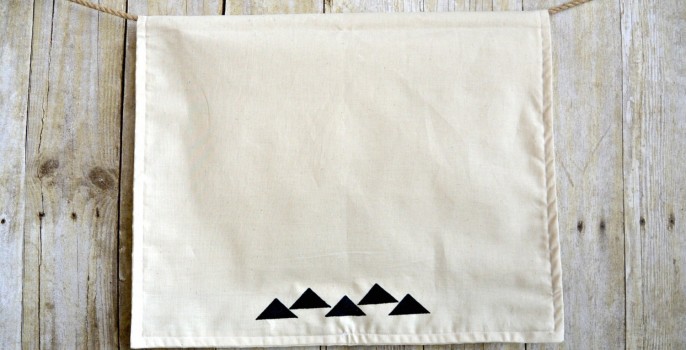
The products in her shop have a simple, rustic feel that she wanted to convey in her photos. Jessica managed to find an inexpensive bulletin board cover that looks like a fence as a backdrop. She hung the towels against the backdrop rather than laying them flat, to better show how the towels look in use.


Staging doesn’t have to be elaborate or expensive. Jessica’s bulletin board cover is a great example – a few bucks well spent. Backdrop paper or a neutral fabric with a light pattern can do the job, too.
Jessica also started adding natural botanical elements like fresh flowers, fruit or dried leaves. She nailed the rustic look that she was going for and made her shop consistent with her overall branding.
Safety in numbers
Professional photographers have expensive studio setups with tons of bright lights to make sure they can consistently take good photos. It’s tougher to get good shots every time taking photos by the light of a window. Jessica learned the secret to getting great shots without the expense of a studio – take lots of photos!

Since natural light and a home studio setup is less reliable, taking 20-100 photos of a single product will increase your odds of snapping that one killer photo. It also gives you plenty of choices for secondary listing photos.
Snap photos until your shutter finger gets tired, then take 10 more. Stand at different distances to the product and try new angles. Without film, there’s no reason to limit yourself to only a handful of shots. Jessica takes at least 25 shots of each item to get a few that she likes.
Brighten, crop, enhance
Why settle for reality? Photo editing software gives you a second chance to improve the shot. Whether you’re adjusting a not-so-perfect angle or cropping out an unwanted part of your photo, you’ll find that your pictures are greatly improved by adding this step to your listing process.

Jessica discovered PicMonkey, a simple online photo editor, through her critique. Picasa is another free tool that makes photo editing a breeze. Both editors even have one-click auto correct for contrast and brightness to take the dull right out. It’s a great way to start out before fiddling with the controls yourself.
Make sure to size all your photos the same so Etsy doesn’t add gray bars to the side of listings photos as customers flip through.
After the critique
Jessica started making changes rapidly after her critique. She was amazed with the photography tips and started taking photos that she never imagined were possible.
I couldn’t make changes fast enough once I knew that there were things I could do to improve.
The upgraded photos made a huge difference for her shop. She immediately started getting featured in lots of treasuries and watched her shop stats slowly climb.
The biggest surprise for Jessica was that she could take these photos herself. Her team members gave her the encouragement and confidence to try her hand at better photography. Jessica went into her critique with an open mind and didn’t take the comments personally, and her shop is so much better as a result.
Six months later, Jessica continues to improve her shop. She views her new product photos as a major accomplishment for a person that hardly knew how to use a camera. She’s proud to have kept her shop’s vision while implementing changes from the critique.
I still have work to do on my shop. The critique was so full of information, it was almost overwhelming. I learned there is a lot that goes into a wonderful Etsy shop, and I still have a lot to learn and improve upon.
I can’t believe how far Emilia’s Luxe Linens has come. I owe Jessica a big thanks for opening up her critique to share the photography tips with everyone.


« Undiscovered Treasures: Sandra Nielen The Foolproof Formula of Successful Sellers »